
To use LUTS in Premiere Pro they can either be selected individually, or you can install them so that they show up in the built in browser. To do the later, they must be installed into the correct location on your hard drive. After that they can be selected using the Lumetri colour controls.
Using a single LUT at a time
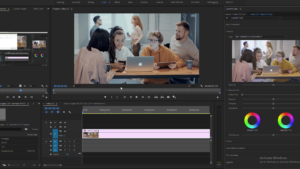
- Select a clip on your timeline
- In the Lumetri panel on the right hand side of the Premiere Pro interface, go to the Creative tab.
- Select the Input LUT dropdown menu, and click on Browse…
- Select a LUT file from the files you downloaded.
Installation
On a Mac:
- Open a new finder window
- Navigate to /Library/Application Support/Adobe/Common/LUTs
- Inside that, locate the “Creative” folder and open that. If it doesn’t exist, create it.
- Copy the LUT files in here. You need to copy the individual files and not the folder.
- If you haven’t already done so, restart Premier Pro
- The LUTS should now be available in the pop-up list in the Creative Tab of the Lumetri interface.
On a PC:
- Go to the C:// directory, navigate to: \Program Files\Adobe\Common\LUTs
- Inside this open the Creative folder. If it’s not there create it.
- Copy the LUTs. you downloaded into this folder.
- Restart Adobe Premiere Pro CC
- The LUTS should now be available in the pop-up list in the Creative tab of the Lumetri interface.